Wednesday, 30 March 2016

Printing

Hey peeps! I’m a bit late for this week’s blog post because my mum has been working on a landscape painting to put into an exhibition which I will be reviewing for you next week. But for now we’re going to talk about print-making!   
For those who don’t know what print-making is, it’s ‘the process of impressing an image onto a material by means of paint or ink’ (I got this quote from a book called Fun with Printing by Pernelle Sévy).


People have been making prints for thousands of years! Some of the first were made by cave people putting their hands up on the wall and blowing paint on them to leave a hand shape. The paint was made from grinding coloured rocks and mixing them with fat. But now we get paint from the store instead of making it out of fat, luckily.

Each Wednesday I go with my mum to print-making classes. At the class Mum takes a lino block and carves out of it with special tools. Then she covers the block with ink and puts it in a big printing press. The press then transfers the ink onto the paper. Only the uncut bits leave a mark on the paper. This is called linocut printing.

Mum's linocut ready for printing
Mum using the press


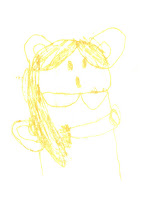
While mum does her lino print I do a drawing which later I put over another piece of paper and some ink. I trace over the drawing with a sharp pencil to create a monotype trace print.  Here’s what one of them came out as. It’s another portrait of Pink! See the resemblance?


Hope you like this week’s post, looking forward to next time, S.

Monday, 21 March 2016

Mum request - PORTRAITS

Hey, guys. Nice to see ya!

This week my mum requested I do a post on portraiture so that’s what I’m going to do.

A portrait is a work of art that looks like somebody. It can be made out of paint, collage, metal or anything that can hold its shape. Even toilet paper rolls! Hey, I might try that.

Anyway, last month we went with an arts group on a bus trip to the National Gallery of Australia to see the Tom Roberts exhibition (here’s a good print out for primary school kids and teachers). Every artist has a different style and Tom Roberts had a very realistic one. I really enjoyed Tom’s Studio kids activity where you get dressed up in a costume. I posed while mum drew me and she posed while I drew her.

In Tom's Studio at the NGA

Me in costume with toy dog
My portrait of mum

Postcard of Blue Eyes and Brown (1887)


I bought a postcard with a portrait by Tom Roberts called Blue Eyes And Brown (1887). I bought it because the girl in the portrait is wearing the same dress that I wore in Tom’s Studio. The next day I did a portrait of Pink. By the way, Pink is my favourite teddy bear.

My portrait of Pink (2016)


My mum helped me set up a mini studio in our loungeroom. I put Pink in an old-fashioned dress and then put her on a little chair with one of my toy dogs. She was very good at staying still while I painted her. I used watercolour pencils. Then added a little water with a paintbrush at the end.


I looked hard at where the wrinkles were in her dress, where her foot was and how much of the chair I could see.


Hope you enjoyed my mum request. Looking forward to next time, S out!

Monday, 14 March 2016

How I Made My Baba Yaga Hut

Welcome to my second blog post. Hope you’ve had an arty week! 

Last time I told you about my Baba Yaga hut (like the one Grayson Perry made, see my first post for more info). Well, this time I’m going to show you how to make your own. 

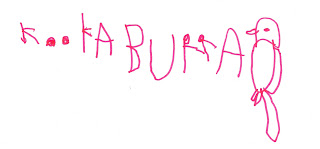
But first a funny fact about myself. When I was four and a half I used to draw kookaburras all the time and also I’m left handed so I used to write backwards like Leonardo da Vinci.

My drawing from 2011


How I Made My Baba Yaga Hut Sculpture

What you’ll need is:

Ingredients (oops! I forgot STRING!)

1. First I started with a sturdy box and covered it with paper. The paper made it easer to stick things to the box. Stick the paper on with craft glue.

Trying to make the roof sturdy
2. I wanted to get the shape of the roof on Grayson Perry’s hut so I folded a piece of paper and stuck the edges to the box.  The paper was floppy, so first I tried some wire but later I bent some cardboard to be a tiny bit smaller than the triangular frame and slipped it inside. That worked.

Detail of collage on roof
3. Grayson Perry’s sculpture is made out of real wood and metal pieces but we didn’t have those so we decided to use COLLAGE. We went through magazines and found lots of rusty and rotted colours and cut them into strips and overlapped them onto the box and roof.  I used pictures of mountainsides, ships, rigging, stone buildings, and even a dark river with lots of rocks.


4. At this stage we went looking in the yard for lots of old metal-looking bits and we also went to the local recycling centre where we found a chain, a tiny picture frame and some golden metal fancy ornaments. Some we stuck on with super glue and some we attached with screws. You could use any bit and bobs you’d like and think would match the house. It’s up to you. 

Mum cut a hole in the side so that the frame became a window. She also cut a hole in the bottom so we could shine a light inside (she also sneakily stuck a picture of a living room inside to make it more cosy).


5. The door and stand and chicken legs are made out of sticks we found in the backyard. The door is a piece of cardboard with little twigs glued on and finally a little metal circle thing stuck on as a door handle. The stand and chicken legs were trickier. The chicken legs are tiny twigs wrapped in masking tape and orange collage. We covered the top of the legs with feather shaped cutouts in the colours of the house. For the stand we used 9 middle-sized sticks. See below for illustration.


I’m really happy about my sculpture and I hope you’ll be happy with yours. It took a couple of weeks to make so BE PATIENT and KEEP GOING! It takes time to make good art. See you next time, S.

Monday, 7 March 2016

My First Blog Post


Hi my name is Siobhan and I am 9. On this blog I will be updating once a week on what I think is good art. Also I’ll be giving you links to fun activities for you to try at home. For example, I really like this one.
I’ll also be putting up funny facts about myself. For example, I don’t like to spell😒. Let’s begin.

On Sunday my mum and I went up to Sydney for the very first Kids Committee at the Museum of Contemporary Art (MCA). It is where kids and their families get together to talk about ways to make the MCA more kid friendly. Although I already really like going there. I especially like the exhibition which is on now about an artist called Grayson Perry (Note from mum: Perry’s subject matter can be very adult but there’s a lot that is suitable for kids and his art is great). 

Thanks, mum. Anyway, back to me.

Grayson’s artwork I like the best is Baba Yaga’s Hut (1983).


The reason I like it is because he made it all out of stuff he found around the back of his home (he lived in London at the time) and in the activity sheet they give out at the exhibition it suggests you make your own. So we did exactly that.


Baba Yaga Hut (2016)
Inside our Baba Yaga Hut (2016)

That’s all from me folks, next time I’ll show you how we made our Baba Yaga hut. Till then, S.